Pumpkins are actually native to North America, in the same family as other squashes, such as butternut and acorn. Their scientific name, Cucurbita (kew-ker-beet-ah), is almost as fun to say as the word pumpkin itself!
We want to make sure you’re ready for pumpkin season, so we’re showing you how to pick the perfect carving pumpkin, how to carve it, and even how to choose and prepare your pie pumpkin for maximum deliciousness.
Is Pumpkin a Fruit?
Have you ever wondered if pumpkins are considered fruits or vegetables? The answer may not seem as obvious as you think. Pumpkins belong to the Cucurbitaceae family and can also be considered squash and gourd. Members of this family bear seeds, which means pumpkins are technically considered a fruit. Who knew?
Carving Pumpkin or Pie Pumpkin?
When we think about pumpkins, most of us don’t think about the difference between the jack-o-lantern we carve for the front porch, and the can of pumpkin we use for our favourite pie recipe. And indeed, they are not the same - carving pumpkins, otherwise known as field pumpkins, are grown for looks rather than flavour, whereas pie pumpkins tend to be smaller, with thicker walls and sweeter flesh - perfect for easy roasting!
Field pumpkins are grown to be huge, round, vibrant in colour, and relatively hollow. They have watery flesh that isn’t as flavourful as pie pumpkins, and their seeds are difficult to de-string, which is why they aren't used for cooking.
Pie pumpkins, on the other hand, are difficult to carve due to their thick walls, but delicious to eat. That’s why choosing carving pumpkins and baking pumpkins separately will give you the best results and the least stress.
Pumpkin Patching
When you visit your local pumpkin patch, be sure to prepare ahead of time. You definitely do not want to end up picking the biggest and most perfect pumpkin only to find out it rolls over when you set it on the ground. Here’s a handy checklist to consider before you go:
- How many people want to carve? Get medium or small pumpkins for everyone, even your kids (they can always paint the pumpkins if they are too young to carve).
- Bring a wagon. If you pick a big pumpkin, it might take a bit of work to lug it from your vehicle to your house.
- Have a carving design or two in mind, whether that's an image or a festive message. Think about how your design is going to look on each pumpkin you inspect.
- Inspect the pumpkins:
- Look for soft spots (they will spread)
- Check for insect holes
- Examine the bottom to make sure your pumpkin has a flat, stable base
- Don’t pick up your pumpkin by its stem. This is the weakest spot and part of the beauty of your carved masterpiece - make sure it doesn’t break off!
- Store them in the coolest place around your house or garage until ready to carve (as long as it doesn’t get below freezing).
Pumpkin Carving 101
Need ideas for carving your first pumpkin? The internet is your friend, full of searchable resources for beginner pumpkin carvers. A few quick searches for easy pumpkin carving ideas, and you’ll be on your way. You can always start with a basic jack-o-lantern grin for both simplicity and old-school appeal.
Carving Utensils
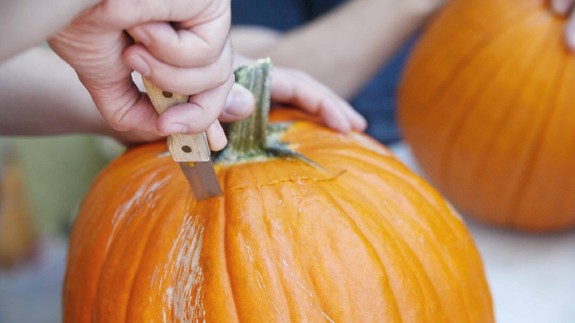
Now that you have a plan, you’re ready to dig in. Even if you don’t have something to work from like a stencil or a video, take a moment to visualize where everything will go on your pumpkin. Draw it out with a pen or marker before you plunge in the knife. And speaking of knives, don't forget to sharpen your blade. Not only is a sharp knife safer to handle, it will also tackle a pumpkin’s thick walls far easier than a dull one. For the best results, get ahold of a special pumpkin carving knife, with a thin serrated blade.
The Carving
1. Remove the top of the pumpkin to scoop out the seeds. Cut a circle larger than your fist, angling inward to the middle of the pumpkin. That way when you rest the lid back on the pumpkin, it won’t fall down in.
2. Scoop out the seeds with a combination of tools: your hand, a pumpkin scooper, and our favourite kitchen hack - an ice cream scoop! This can take some time, as the seeds can be stringy and not want to release their grip on the pumpkin walls.
3. Make sure your design is drawn on the pumpkin just as you’d like once the top is off and the inside is nice and clean. A standard pen or marker will do the trick. Then, use gentle and slow movements to carve out your jack-o-lantern’s look. When done, admire your work! Illuminate with a battery-operated candle or LED light for the safest and most reliable evenings out on your front porch.
How long do pumpkins last?
In a cool room or garage (but not below freezing), a whole pumpkin will last months. Once carved, keep the pumpkin as cool as possible, and cover it with a damp towel on warm dry days. Take care of your pumpkin, and you should be able to keep your masterpiece glowing for a few weeks, or even more if you live in a cool climate.
How to Cook Fresh Pumpkin
Since you now know that carving pumpkins and pie pumpkins are not the same, head to your produce department and pick out a few sweet baking pumpkins, using the same basic guide as above: no soft spots, no insect holes. Pick a pumpkin that is heavy for its size—this means lots of sweet flesh inside.
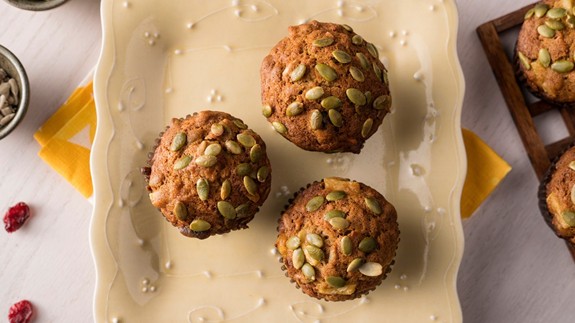
Treat your pie pumpkin just like a butternut squash: the best flavour will be from roasting in the oven. Get it ready for baking any way you’d like. The simplest is to split it in half, remove the seeds, and lay it face down on a sheet pan. A gentle roast at 350 degrees F (177 degrees C) for 45 minutes should be just about right. Check for softness in the skin and fork-tenderness. Don’t forget to save the seeds later to use in a batch of Morning Glory Muffins!
Once your pumpkin is baked to soft perfection, peel and puree in a food processor to achieve a smooth texture. Get ready to make amazing recipes with your real pumpkin. Any time you see “canned pumpkin” in a recipe, just use your own fresh puree in equal amounts!
Fresh Pumpkin Recipes
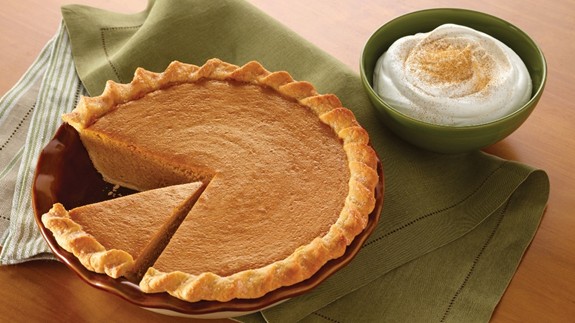
Start with a Signature Pumpkin Pie, of course. You’ve put in the work to make your own fresh pumpkin puree, so enjoy the fruits of your labor with the most quintessential holiday dessert. Not having to depend on canned pumpkin is a great feeling. To make this fall favourite, all you need is pure vanilla extract, pumpkin pie spice, some eggs, and sweetened condensed milk. Add some whipped cream or vanilla ice cream for an indulgent dessert the entire family will love.
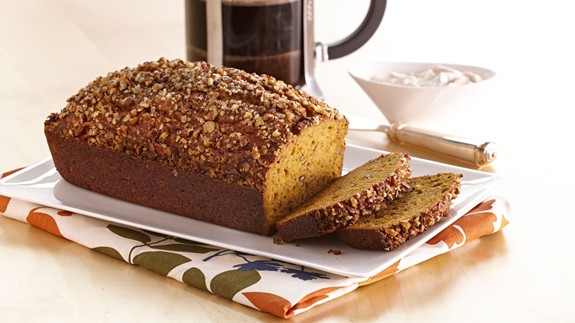
Beyond the pie, there are some wonderful things to do with any extra roasted pumpkin. How about a tasty dessert that takes the stress of pie dough out of your life: these Spiced Pumpkin Cupcakes are exactly what a cool fall evening calls for. Or, make a Pumpkin Spice Bread– flavoured by pumpkin pie spice, chopped pecans, and orange juice, it’ll make your coffee break snack worth the wait.

Because pumpkin is a squash, it is perfect in savoury recipes, too. This Latin Beef Stew with Pumpkin, Yuca and Plantains is a Latin American stew served at special occasions and holidays. Each country has its own take on the recipe, but it typically consists of hearty meat and vegetables like West Indian pumpkin and squash, simmered in a savoury, seasoned stock.
Follow that up the next morning with a delicious plate of Pumpkin Pancakes!
Feeling adventurous? Level up your pumpkin appreciation with a traditional Middle Eastern Chickpea Ground Lamb Breakfast Hash with Skhug Sauce.
With a long and delicious North American heritage, there’s a lot to love about pumpkins, especially when you choose your own and do the work to give it the flair of your kitchen.